Configure SAML single sign-on for portal-only customers with Entra ID (formerly known as Azure AD)
Introduction
Security Assertion Markup Language (SAML) is an open standard for exchanging authentication and authorization data between parties, such as an identity provider and a service provider.
SAML for single sign-on (SSO) allows customers to authenticate through the organisation's Identity Provider (IDP) when logging in to the Jira Service Management Customer Portal. During an active session, customers only need to log in once to access multiple portals for one Jira Service Management instance.
Customers outside the organisation can only access the organisation's Jira Service Management portal. Atlassian does not count these customers toward the Atlassian Guard subscription billing. Learn more about Jira Service Management customer accounts.
Pre-requisites
To configure SSO for JSM Portal-only customers, you need:
- Jira Service Management Portal
- Atlassian Guard Subscription
To configure SSO for JSM Portal-only customers, you need below roles:
- Organisation Admin role for Atlassian organisation
- Cloud Application Administrator or Application Administrator for Entra ID
Steps to configure single sign-on
Please follow the below steps to configure the SSO with the Entra ID for JSM Portal-only customer users:
- Log in to the Entra ID Portal.
- Navigate to Enterprise applications.
- Click on New Application and select Create your own application.
- Select the option Integrate any other application you don't find in the gallery (Non-gallery).
- Provide the name “Atlassian JSM Portal SSO” or any other suitable name and create the application.

- Access the Enterprise application that was set up, such as Atlassian JSM Portal SSO.
Open the Single Sign-On tab.
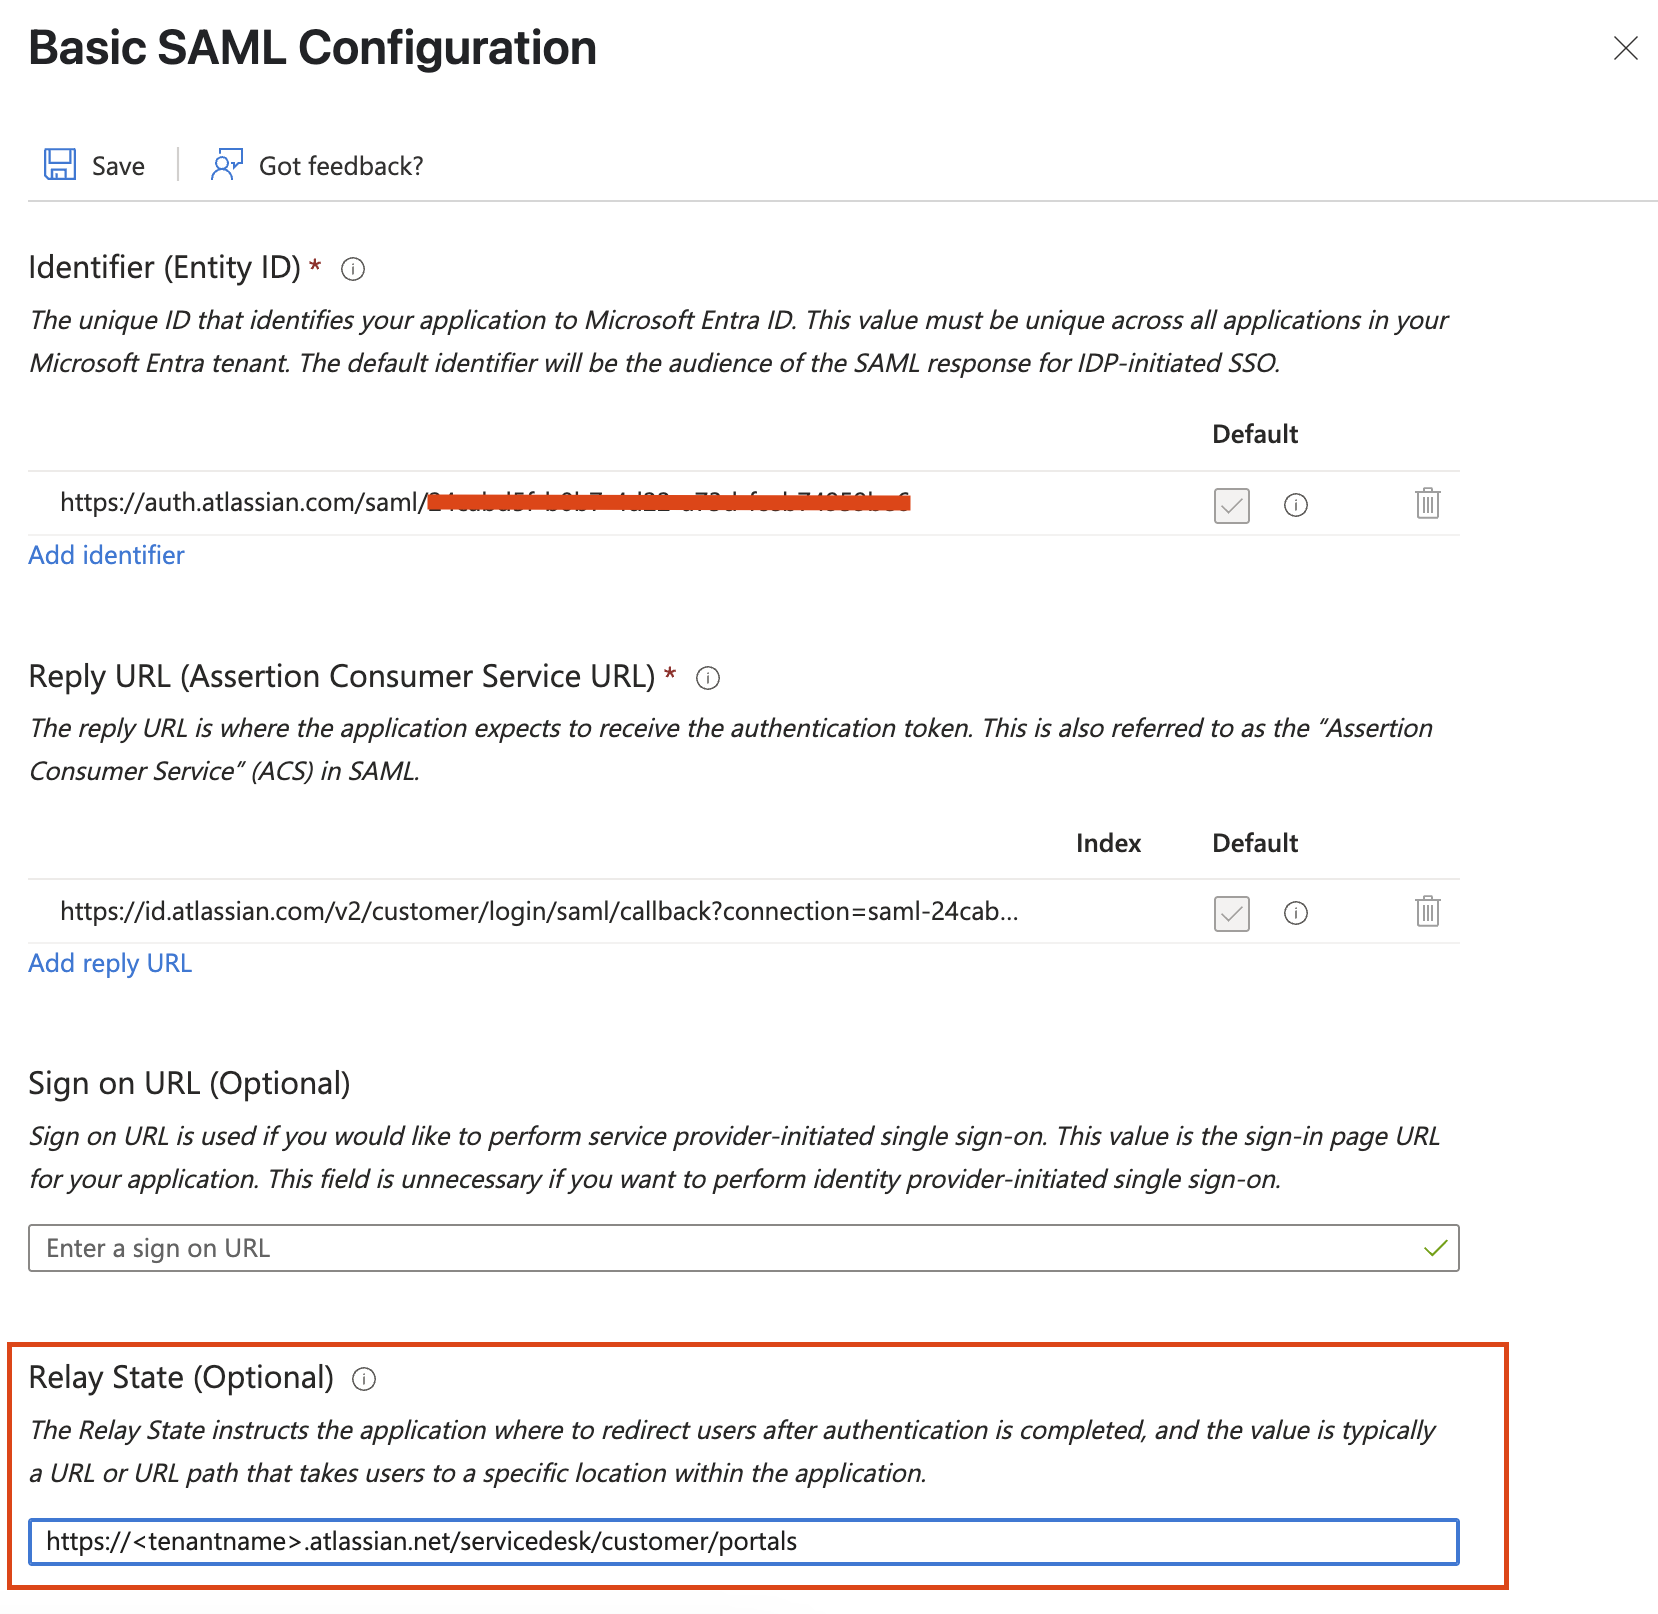
Set up the Basic SAML configuration and enter dummy placeholder value.
Save the changes.

Modify section 2: Attributes and Claims
- givenname >> user.givenname
- upn >> user.objectid
- surname >> user.surname
- Unique User Identifier (Name ID) >> user.mail
- Align the Entra ID attributes with the necessary SAML attributes listed as below & eliminate any additional attributes:

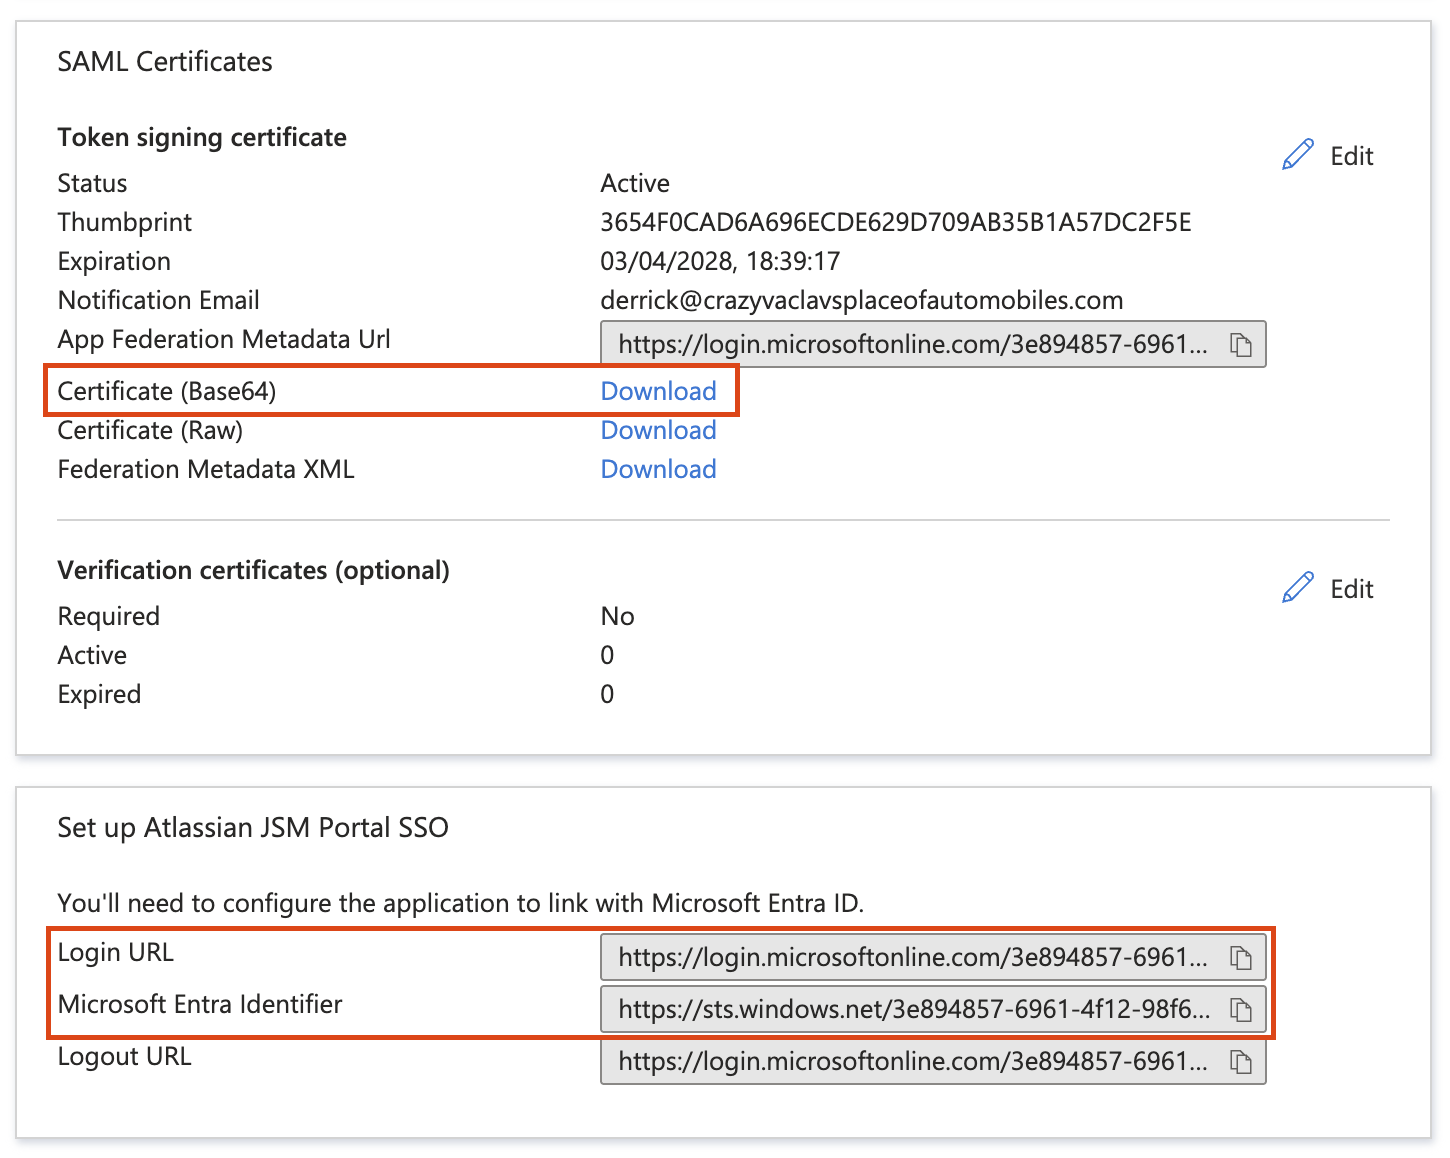
Copy the below details from Section 3 & 4: Set up Atlassian JSM Portal SSO & SAML Certificate
Microsoft Entra Identifier
Login URL
Download Certificate (Base64)
For Centralized user management organisation:
- Navigate to admin.atlassian.com > Products > Sites and products > Select the Site:

- Under Jira Service Management > Portal-only customers:

For Original user management organisation:
- Navigate to admin.atlassian.com > Products > Sites and products:
- Under User Management > Jira Service Management:

- Click on 3-dots and select Identity providers:

- Select option Microsoft Azure AD:

Enter the appropriate Directory name and click on Add. On the following screen, select Set up SAML single sign-on:

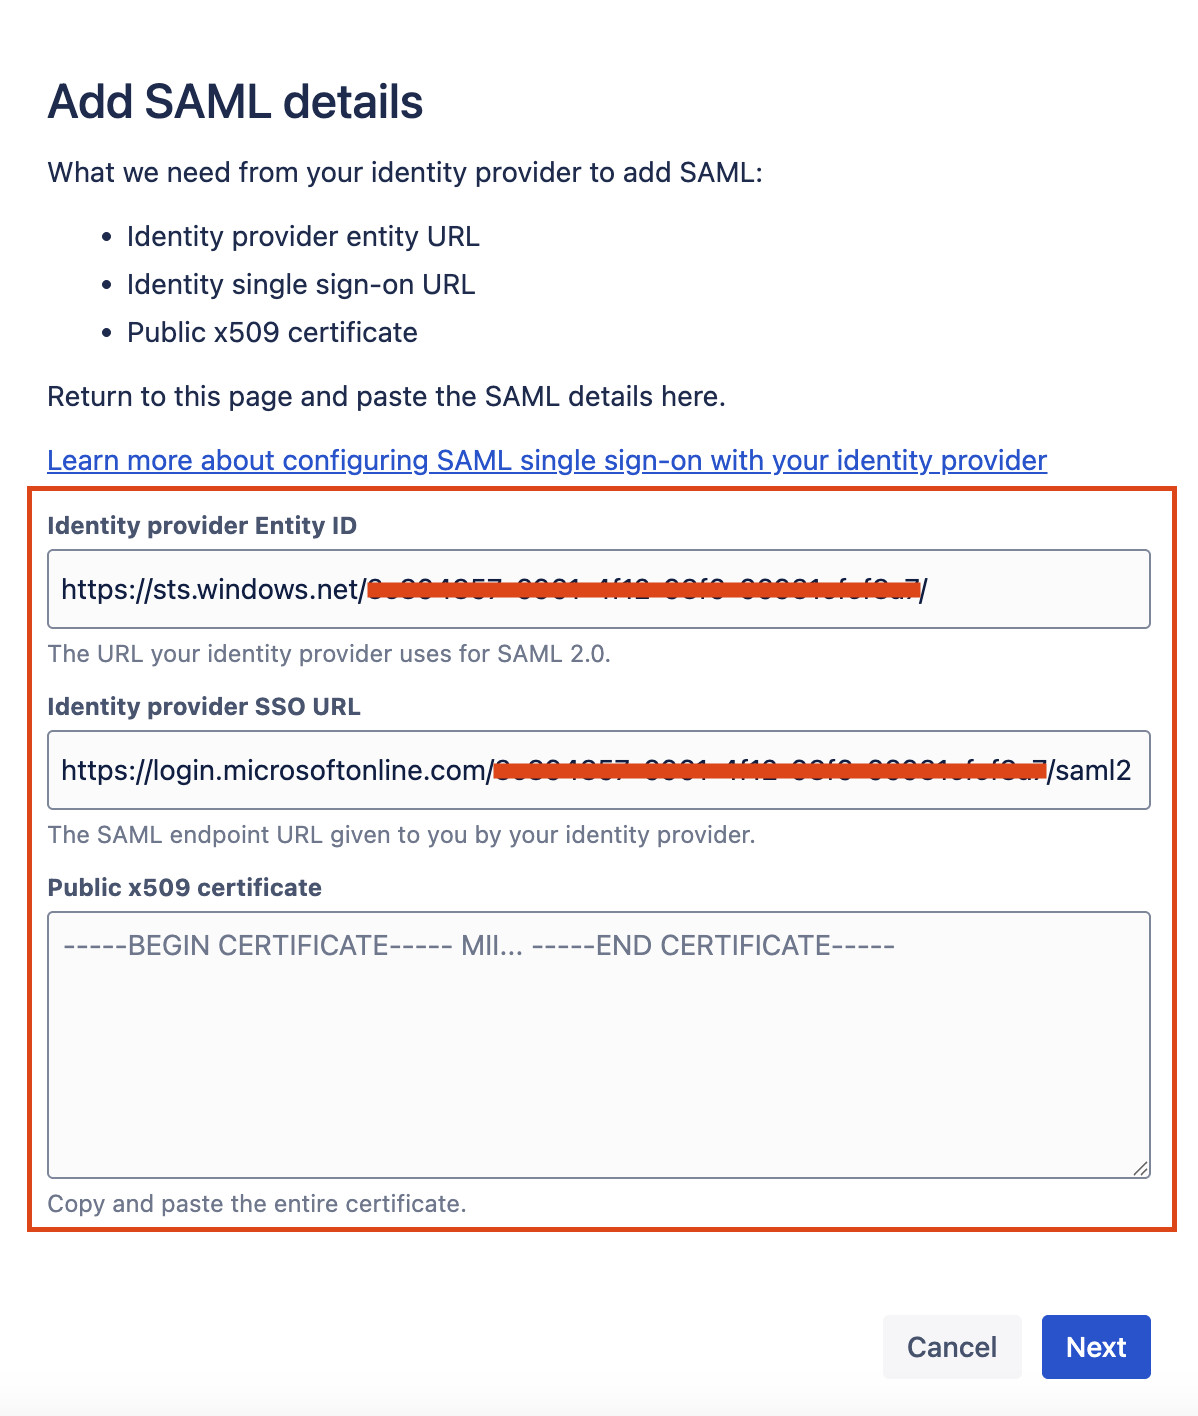
- Paste the Microsoft Entra ID Identifier into the Identity Provider Entity ID.
- Paste the Microsoft Login URL into the Identity Provider SSO URL.
- Open the downloaded certificate and paste the value into the Public x509 certificate field.
- Click on Next.
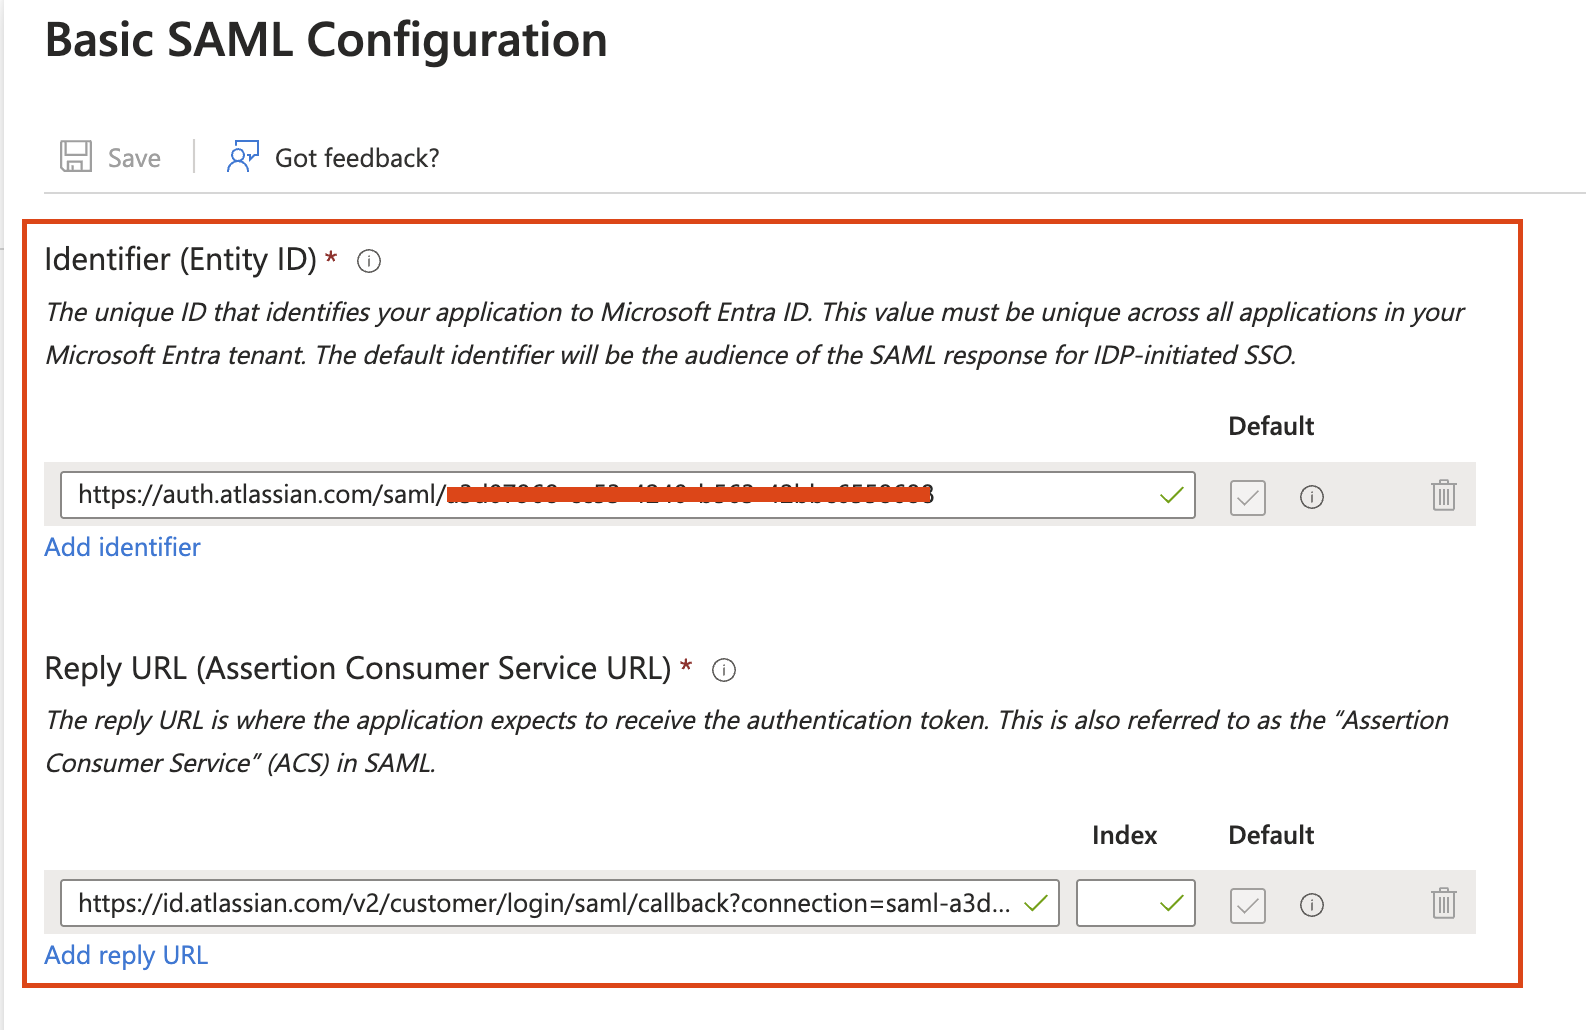
- Copy the Service provider entity URL.
- Copy the Service provider assertion consumer service URL.
- Click on Next.

- Paste the Service provider entity URL to the Identifier (Entity ID).
- Paste the Service provider assertion consumer service URL to the Reply URL (Assertion Consumer Service URL).
- Set the RelayState to your JSM Portal URL E.g. https://<tenantname>.atlassian.net/servicedesk/customer/portals
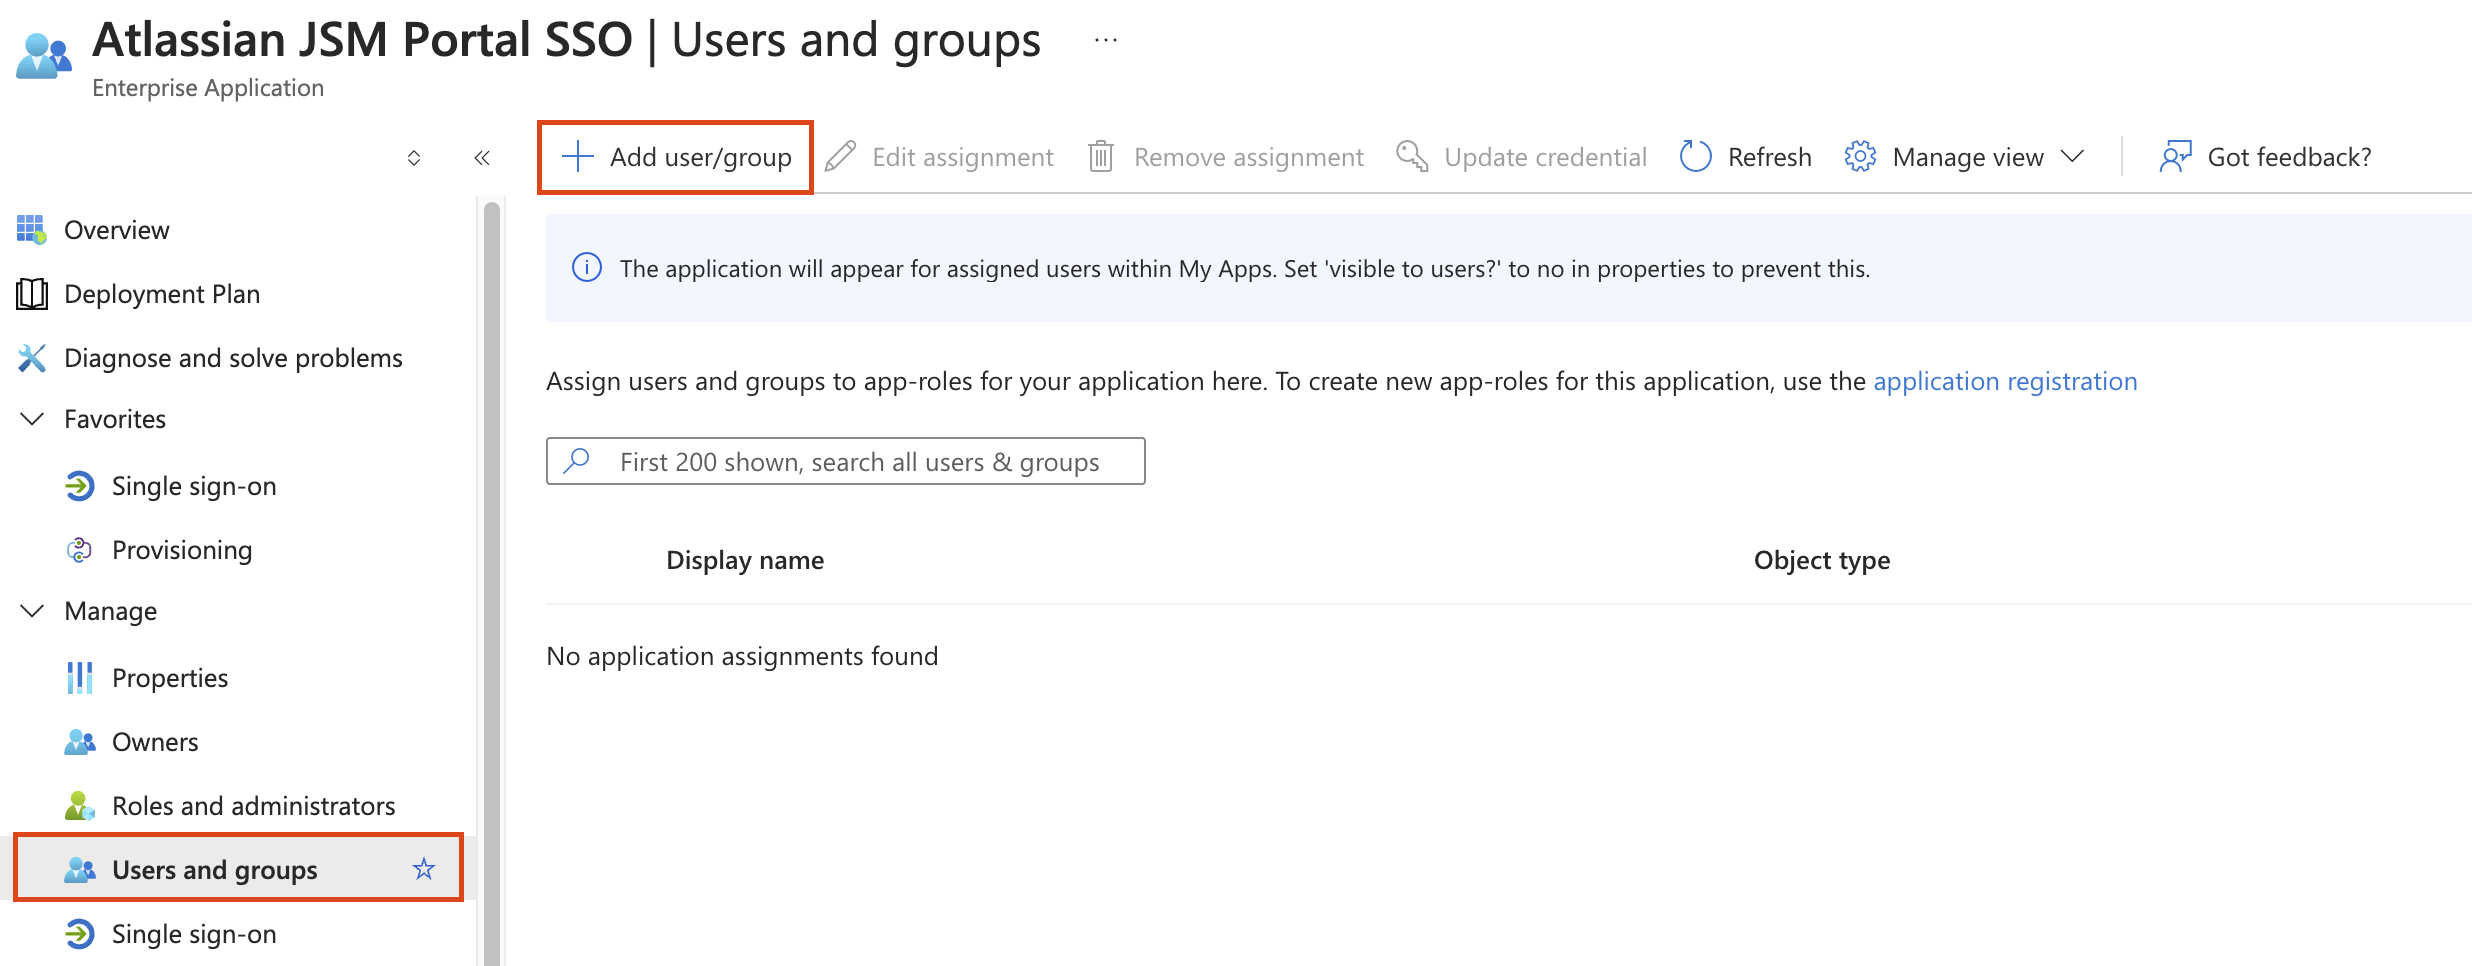
- Go to Users and Groups on Entra ID.
- Assign test users to the newly created enterprise application.
- Make sure the same test account is configured as a Portal-only account int the JSM site as well.