Managing linked Bitbucket and GitHub accounts
When opened in a viewport, the user will be redirected to: Connect Bitbucket Cloud to Jira Software Cloud.
After you link a Bitbucket Cloud or GitHub account with Jira Software, you can manage the settings for the linked account. You'll see different settings depending on the DVCS and how the account was linked:
| Bitbucket account linked manually | Bitbucket and Atlassian Cloud linked account | GitHub account |
|---|---|---|
 |  | 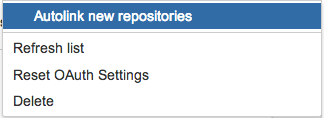 |
These options have the following meanings:
| Option | Availability | Description | |
|---|---|---|---|
| Autolink new repositories | All | Set to automatically links new repositories added to the account. | |
Enable smart commits on new repositories | Bitbucket Cloud | Set to enable the smart commit functionality for new repositories added to the account. | |
| Refresh list | All | Synchronize repositories. If Autolink new repositories is disabled, the refresh process also retrieves new repositories. | |
| Configure automatic access | Bitbucket Cloud | Determines which new Jira Software users receive invites to your team. You should learn how to configure user invitations.
| |
| Reset OAuth Settings |
| Regenerates the OAuth access token you configured before connecting to your repositories. | |
| Delete | Bitbucket with Atlassian Cloud does not support this. | Delete a linked account. All the linked repositories are removed too. | |
How to find these settings in Jira Software
Log into your Jira Software instance using an account that has administrative access. Then, do the following:
- From the Jira Software dashboard click the
 (settings) icon
 - Choose Add-ons.
- Locate the Source Control section and choose DVCS Accounts.
The Manage DVCS Accounts page displays with the list of linked accounts. - Click the the (settings) icon for the account.
The options menu appears. - Configure the options as you like.