Bulk deactivate Atlassian accounts using Postman and REST APIs
Platform Notice: Cloud - This article applies to Atlassian products on the cloud platform.
When to use this article
This article may be used any time there is a need to disable/deactivate Atlassian accounts in bulk. If an end user has a deactivated Atlassian account, then that user is not able to access any Atlassian Cloud service. It is only possible to deactivate Atlassian accounts that your organization manages - What are managed accounts?
When not to use this article
This article will not work for organizations with users and groups provisioned with Atlassian Guard SCIM, as these users will be recreated following the next update/synchronisation. Please refer to your identity provider administrator to make changes to users provisioned through SCIM.
Identify your organisation’s user management UI experience
Head to admin.atlassian.com. Select your organization if you have more than one.
Original | Centralized |
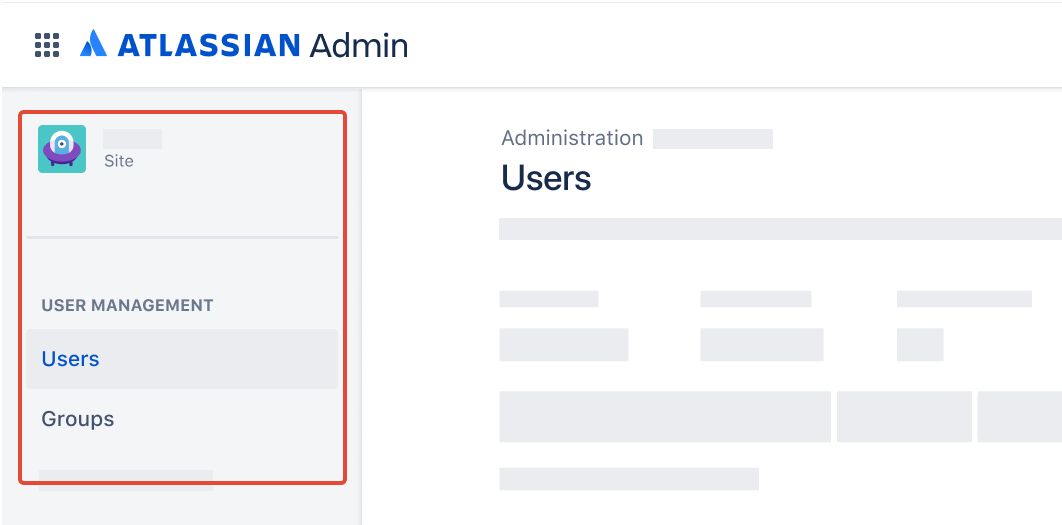
As a site administrator or organization admin, Users is found under the Product site. If the Users page is not present under the Directory tab, then you have the Original user admin UI experience.
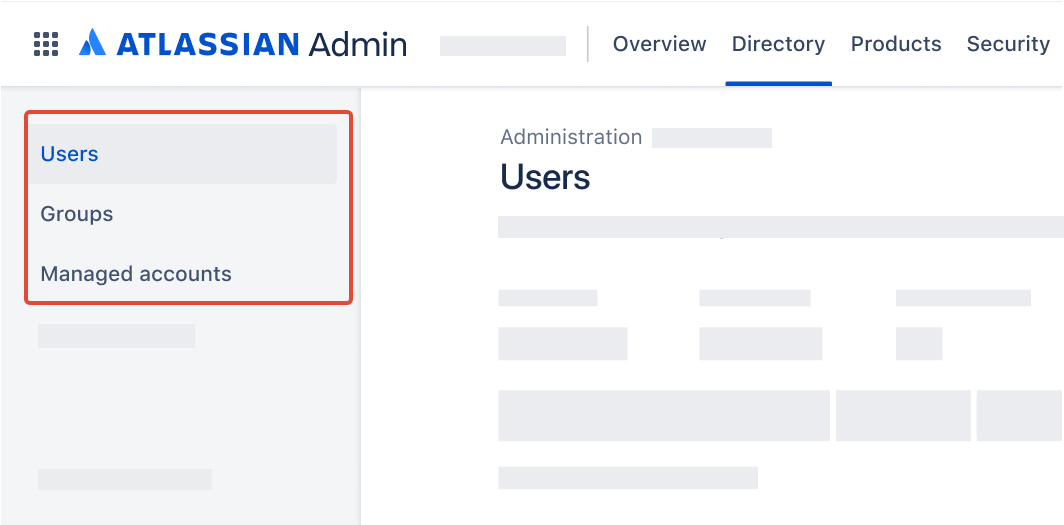
| As an organization admin, Users is found under Directory tab.
|
Prepare data
Go to admin.atlassian.com. Select your organization if you have more than one.
Navigate to Users > Managed accounts.
Select Export members.
An email will be sent when the CSV file is ready to download. Check your junk or spam folder if it’s taking a while.
Open the email and select Download CSV file. If you’re not logged in, you may need to log in before the download will begin.
Using a spreadsheet program or text editor, remove all rows that should not be deactivated, for example, organization administrators.
Ensure that the user executing the deactivation is removed.
Ensure the column "Atlassian ID" (the Atlassian account id) is not removed during cleanup.
- Save the CSV, which now contains a list of all users' Atlassian accounts to be deactivated.
Set up Postman
This section may be skipped if:
a collection named "Atlassian Cloud User Management (Org API key)" has previously been set up, and
an environment named "Atlassian Cloud (with Org API key)" has previously been set up
Set up REST API call
Click New, or type
Ctrl+N(Windows/Linux) orCmd+N(MacOS).Select "HTTP".
Name the request "Deactivate Atlassian account".
Change the method from
GETtoPOST.In the URL, paste:
https://api.atlassian.com/users/{{Atlassian ID}}/manage/lifecycle/disableClick the "Authorization" tab.
Ensure Type is "Inherit auth from parent".
Click Save , saving into the "Atlassian Cloud User Management (Org API key)" collection.
Execute runner
Change the environment using the environment selector at the top right of Postman, selecting "Atlassian Cloud (with Org API key)".
Select Collections in the sidebar.
Select the "Atlassian Cloud User Management (Org API key)" collection.
On the Overview tab, select ▶️ Run towards the top right corner.
Under Run order, ensure there is one and only REST API call - "Deactivate Atlassian account".
On the Functional tab, select Run manually.
Click Data.
Navigate to and select the previously prepared CSV file.
Reduce the number of "Iterations" under Run configuration to 1.
Leave Advanced settings as is.
Click Run Atlassian Cloud User Management (Org API key).
Check Postman to ensure the runner collection has passed all tests. The run results should show:
"Iterations" and "All tests" to be equivalent in count
Passed (n) where n is the number of iterations
Failed (0)
Skipped (0)
Check the Managed accounts page to ensure the Deactivated count of users has increased by 1.
Rerun Postman Runner following the previous steps, with the number of "Iterations" set to the number of rows in the CSV file. One error may be expected as it is not possible to deactivate a user that has already been deactivated.
References
- Export managed accounts
- Atlassian User Management REST API - Deactivate a user
- Postman - Using the Collection Runner