Customising your Issue Navigator
The issue navigator displays the search results from an issue filter, a quick search, a basic search or an advanced search.
You can customise your Issue Navigator by choosing:
- the columns (i.e. issue fields) to display
- how many rows (i.e. issues) to display
On this page:
Related topics:
Customising your columns
To choose which columns (i.e. issue fields) to display:
- Choose Issues > Search for Issues.
- Select Tools > Configure Columns, the following screen is displayed:
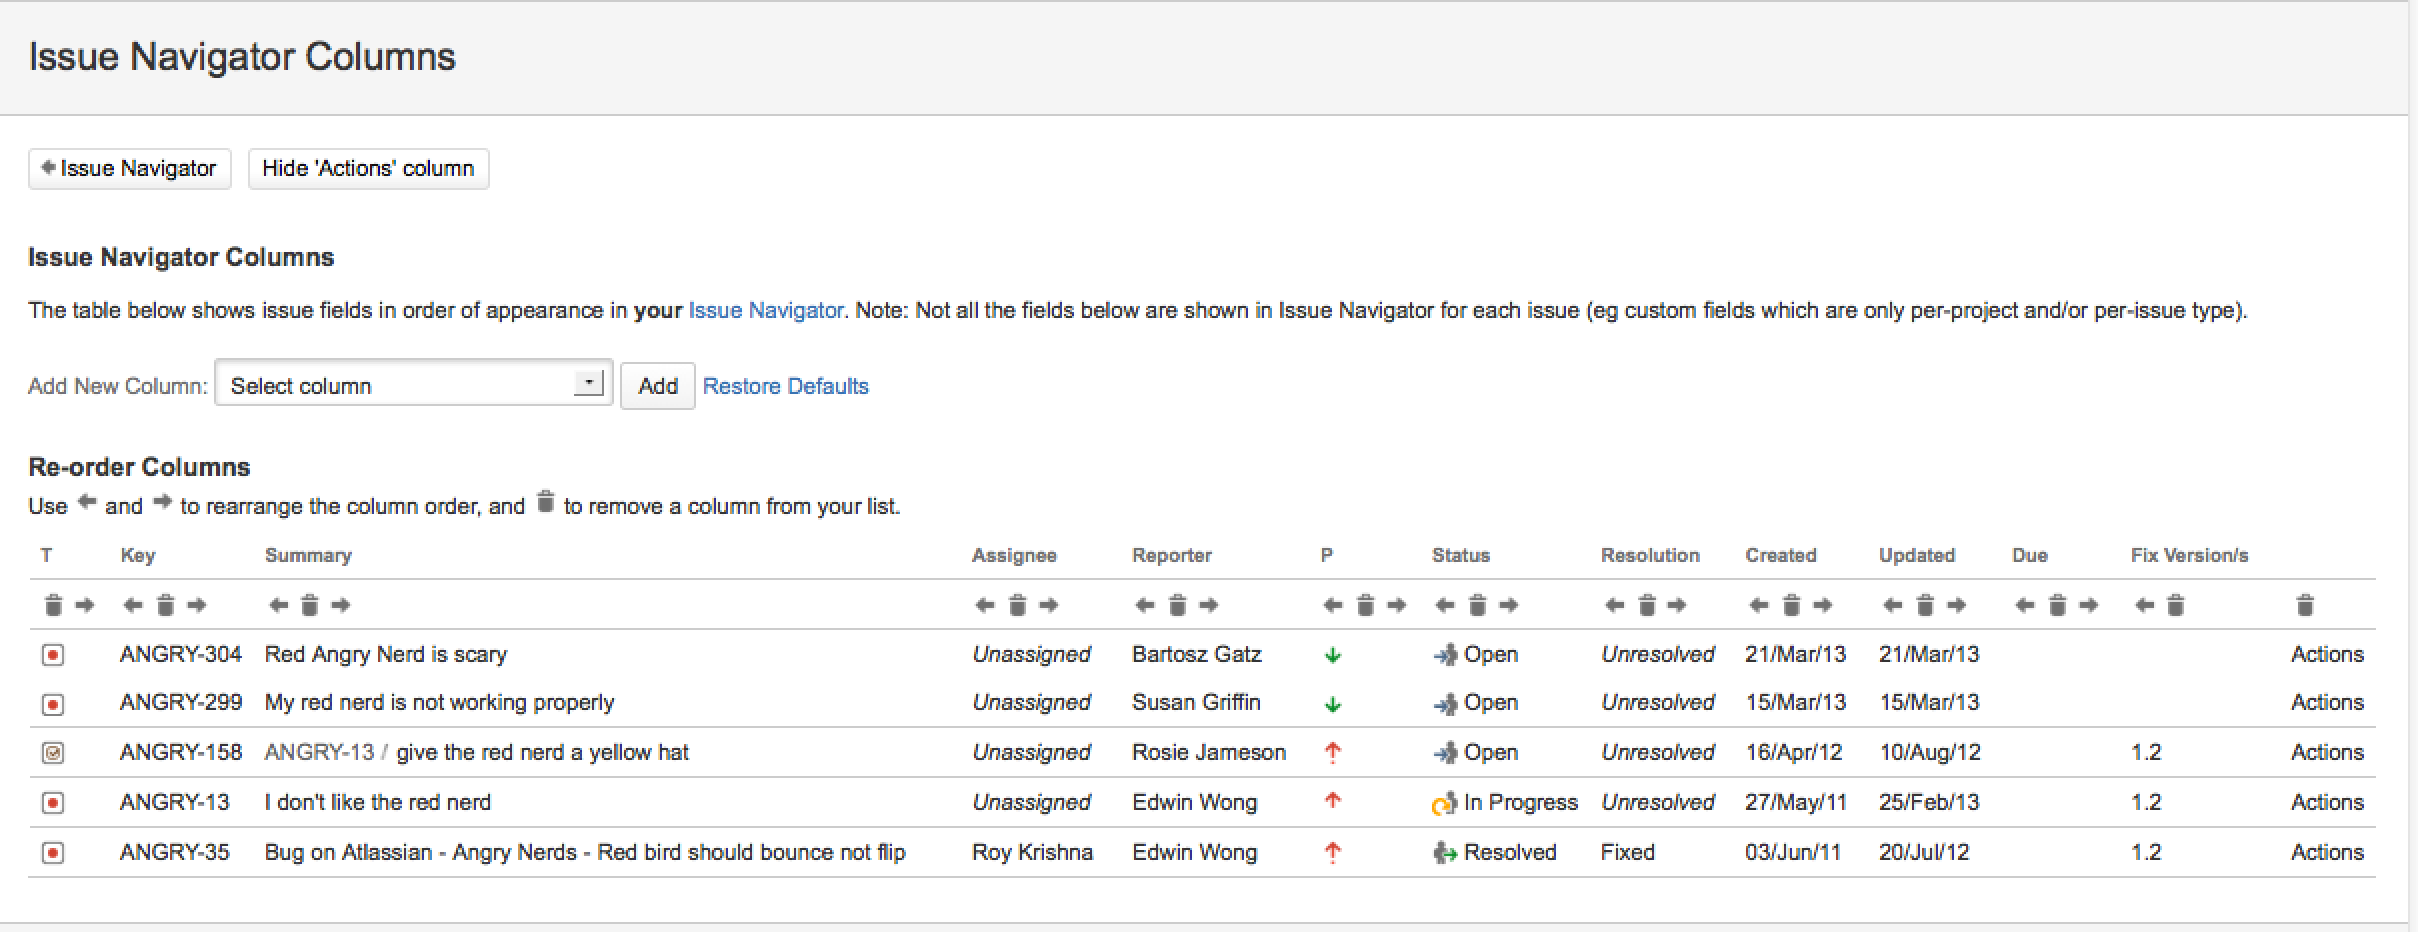
Actions:- To move a column left or right: click on the left-arrow or right-arrow icon that appears under the column's heading.
- To remove a column from the list: click the bin icon which appears under the column's heading.
- To add a column to the list: select the issue field name from the Add New Column dropdown and click Add. The column appears in the right-most column space, reposition it as desired using the arrow icons.
- To hide the 'Actions' column: click the Hide Actions Column button at the top of the screen.
- To restore the default configuration: click the Restore Defaults link.
Customising your rows
To choose how many rows (i.e. issues) to display on each page:
- Choose your user name at top right of the screen, then choose Profile.
- Click the pencil icon next to the Preferences section. The 'Update User Preferences' page is displayed.
- Update the Page Size field with your preferred number of issue rows, (the default is 50).
- Click the Update button.
Last modified on Apr 3, 2013
Powered by Confluence and Scroll Viewport.